
Step 1
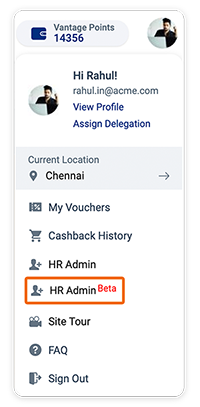
On the web app, click your profile icon on the top right. Choose HR Admin Beta from the drop-down menu.
Step 2
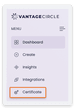
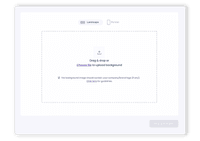
You will be redirected to the HR Admin Beta Dashboard.
Step 3
On the HR Admin Beta Dashboard, locate the left-hand navigation bar and select Certificate.

Selecting the Certificate Template
The process of creating a certificate involves selecting a template that suits your needs and then customizing it accordingly.
There are two options for selecting a template: starting from scratch with a blank template or choosing an existing template. Both options are customizable, allowing you to add a personal touch.
Step 4
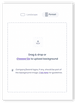
You will be redirected to the Create Certificate page.


Step 5
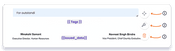
To get started with creating a custom certificate, start by determining the purpose of your certificate:
- Recognition: Choose this if the certificate is intended for both non-monetary and monetary awards.
- Service Anniversary: Opt for this if commemorating work anniversaries.

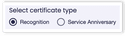
Click on the relevant option and proceed to the next step.
Step 6
Next, decide on your certificate’s design approach:
- Start from scratch with the Blank Template option.
- Opt for an existing certificate template. You’re free to customize this further or use it as it is.
Click on the template you want to proceed with.

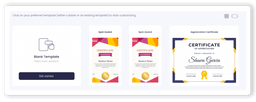
Tip: Browse the existing certificate templates by using either the grid view or the scroll view, which are located in the top-right corner of the panel.
Add Background Image
Once you have selected the initial criteria, you will be redirected to the next page in the certificate customization process.


This step allows you to add a background image, enhancing the certificate’s aesthetic. To align with your branding, consider including your company’s logo and color palette in the background image.
Note: This option is exclusive to those initiating with a Blank Template. If you’ve chosen a pre-existing template, you’ll bypass this step.
Here are your customization options:
Step 7
Begin by setting a certificate name on the page’s top-left. Ensure it’s at least 3 characters long. This step is pivotal; failing to set a certificate name stops you from going to the next step.


Step 8
Select what orientation you want the certificate to have:
- Choose Landscape for a wider, horizontal layout.
- Opt for Portrait for a taller, vertical layout.


Step 9
Depending on your choice above, you’ll notice variations in the Background Upload section.
For Landscape Option:
For Portrait Option:

Step 10
Regardless of your orientation selection — Landscape or Portrait — the image upload procedure remains consistent. Click on “Choose file” and pick your desired certificate background image.


Step 11
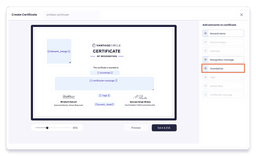
Once you upload the image, a pop-up emerges. Here, you need to modify the image’s position and size to fit the prescribed design constraints (indicated by a blue box):
- Size: Use the slider located at the pop-up’s bottom-left to zoom in or out.
- Position: Click and drag the blue square to pinpoint your desired background focus.
Once satisfied, click on the “Crop” button located at the pop-up’s bottom-right.


Step 12
Preview your certificate’s design so far. If it aligns with your requirements, select “Save & Proceed.” For changing previous modifications, use the “Back” button.


Add Customizations
Once you proceed to the next step, you will land on the Customization page.

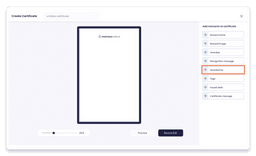
Here, you can tailor the certificate design to your specific preferences. Let’s dive into the process.
Step 13: Selecting Elements
To your right, discover a collection of dynamic elements (i.e., customization options) that can enhance your certificate design.

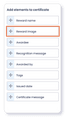
Note: You can choose all or none of these customization elements— the choice is up to you.
Step 14: Adding Element(s)
Simply click on an element from the list to add it to your certificate design layout.
Step 15: Position the Element(s)
By default, newly added elements might land randomly on the certificate design. However, you can adjust the element’s position depending on where you want to see it in the final certificate.
To do that, select the element you want to re-position and:
- Move: Click on the first icon. Drag the element to its desired position.
- Preview: Select the second icon to glimpse a demo of the element, giving insight into its potential content or text.
- Delete: Should an element feel out of place or unnecessary, use this to remove it from your design.

Finalizing The Custom Certificate
Once you’re happy with the certificate, click on the Preview button to see what the final certificate will look like. If you’re happy with the outcome, click on the Save & Exit button.
Congratulations, you have successfully created a custom certificate!